“`html
How to Effectively Transfer Data from Your Old iPhone to New iPhone in 2025
Upgrading to a new iPhone can be an exciting experience, but it also comes with the challenge of transferring your data from your old device to the new one. In this comprehensive guide, we’ll explore various methods and best practices for transferring data from your old iPhone to new iPhone seamlessly, ensuring you don’t lose any valuable information during this process.
Understanding the iPhone Setup Process
When you’re setting up a new iPhone, understanding the complete iPhone setup process is crucial to ensure a smooth transition. The initial setup becomes easier if you know the specifics of how to back up your old device and restore the backup on your new device. This process often involves using your Apple ID, which is essential for syncing your data securely. During the setup, you’ll need to decide whether to transfer data directly or restore from an existing backup, which can include everything from messages to music.
The Role of Your Apple ID in Data Transfer
Your Apple ID plays a significant role during the transfer process. It not only facilitates the iCloud backup but also lets you access app purchases and your personal information across devices. If you haven’t linked your old iPhone with your Apple ID, or if you’re switching to a new Apple ID, you may face issues with transferring purchased apps or other content. It’s important to ensure that both old and new devices are logged in with the same Apple ID to streamline the transfer process and maintain data integrity.
Preparing Your Old iPhone Before Transfer
Before you initiate the transfer, it’s essential to prepare your old iPhone. This means updating your device to the latest iOS version, which can prevent compatibility issues. You should also remove unnecessary apps and files to free up space and keep your data organized. Additionally, turning off options like iMessage and FaceTime on your old device before the transfer can simplify things and avoid potential conflicts.
Choosing the Right Method to Transfer Data
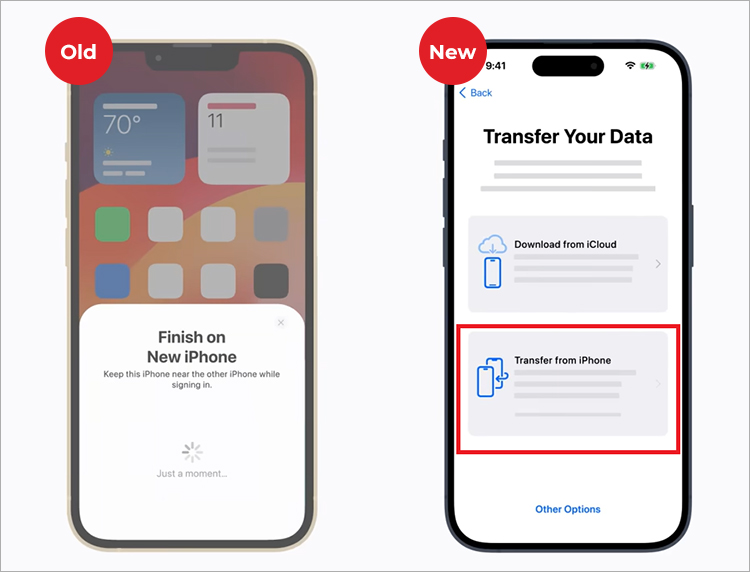
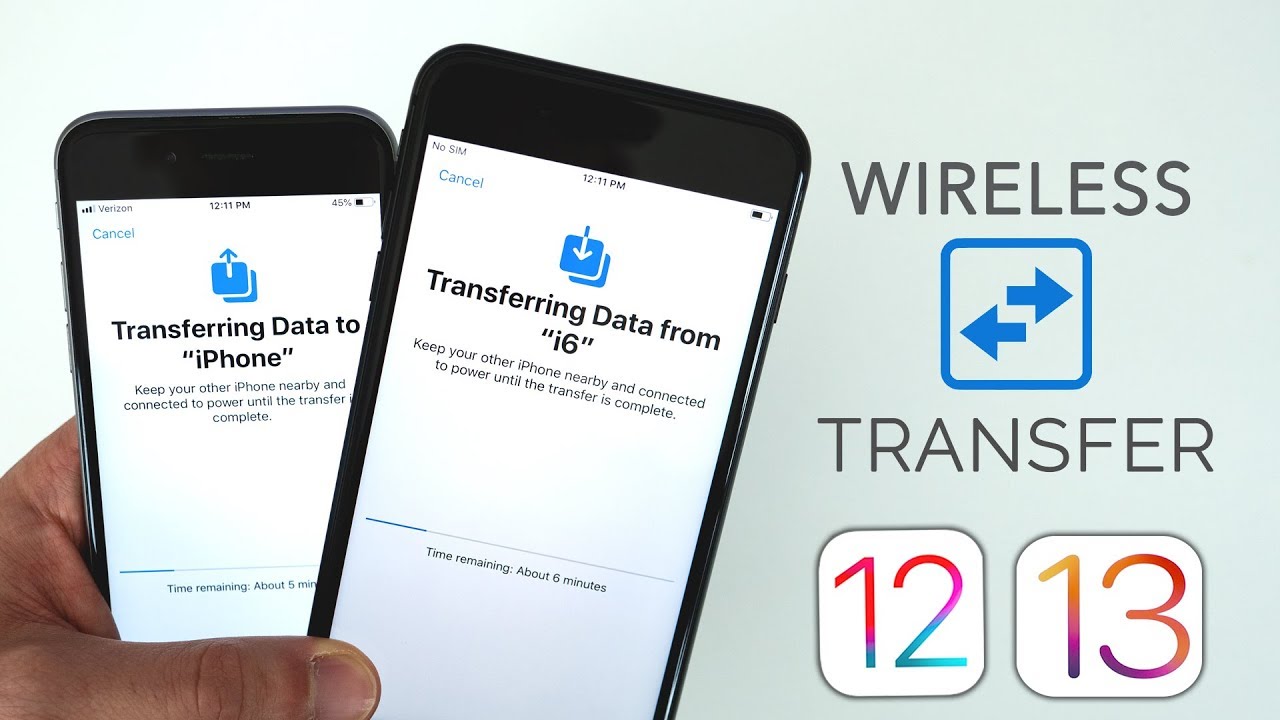
There are multiple methods available to **transfer data from your old iPhone to new iPhone**. Whether you choose the **Apple Quick Start feature**, use **iCloud**, or opt for **iTunes**, selecting the right method depends on your specific needs and preferences. The **Apple Quick Start** utilizes Wi-Fi and Bluetooth to create a seamless transfer experience, automatically migrating settings and data with just a few taps. If Wi-Fi is limited, you might consider utilizing a wired connection with a Lightning-to-USB cable via **iTunes**.
Using iCloud for iPhone Transfer
One of the most popular methods to **move contacts from old iPhone to new iPhone** is using iCloud. This cloud service enables you to back up your information and restore it on your new device effortlessly. Prior to starting, make sure to verify that both phones are connected to the internet and updated. iCloud can sync not only contacts but also photos, notes, and more, providing a complete transfer experience. In just a few steps, you can manage and access your data, making this method particularly advantageous for first-time learners about iPhone migrations.
Steps to Use iCloud for Data Transfer
Before using **iCloud for iPhone transfer**, ensure that you’ve backed up your old device properly. You can do this effortlessly by visiting Settings > [Your Name] > iCloud > iCloud Backup, then tapping ‘Back Up Now’. Once your data is properly backed up, you can initiate the setup on your new phone and select the ‘Restore from iCloud Backup’ option during the iPhone setup process. This will import all your saved data, including apps, settings, and documents, creating a mirror of your previous setup on your new device.
Backup Methods: iCloud vs. iTunes
While **iCloud** is an incredibly convenient option, it is not the only way to ensure your data is safe during transfer. **iTunes** remains a robust solution for those who prefer wired connections and direct control over their backups. After connecting your old iPhone to your computer, you can select ‘This Computer’ for your backup location. Once done, you can easily restore this backup on your new iPhone in a similar manner during the setup process. It is critical to remember, however, that using iTunes requires updated software and enough storage for both devices to ensure successful migration.
Transferring Messages, Photos, and More
When thinking about switching iPhone without losing data, it’s vital to know how to transfer specific data types like messages, photos, and music. These elements are often most valued by users. With newer iPhone models, transferring data can be done quickly with features like AirDrop—which simplifies immediate sharing—or through messages options specifically designed for **transferring messages to new iPhone**. Keeping your media files organized during this transfer can prevent important memories from being overlooked.
Transferring Photos and Music
One exciting option is to utilize **Apple Music** or **iTunes** to ensure your music collection transitions smoothly. If you’re fretting about your precious photos, consider using **iCloud Photos** to simplify migrating your image library directly to your new phone. You can also opt for third-party apps that specialize in **transferring photos to new iPhone** to manage large photo libraries. Ensuring your photos are backed up before making any transfers is a smart practice to avoid data loss during your iPhone migration.
Best Practices for Effective Data Transfer
This migration process is a delicate balance between ensuring your previous files are secure and enabling the rapid transfer of new data. To optimize your experience, remember to charge both devices, allow time for backups, and confirm that all data has moved correctly. Reviewing your settings post-transfer, including options for syncing notes and calendars is also advisable. Ensuring both devices have strong Wi-Fi or using wired connections can prevent any interruptions during completing these processes.
Troubleshooting Common Transfer Issues
Encountering issues during the transfer process can be frustrating. Issues might include connectivity problems, data not fully transferring, or interruptions that require troubleshooting. Keeping track of the data transferred is critical to guarantee that no important information is lost during the switch. If you face difficulties, sometimes a simple reboot of both devices can resolve lingering issues. In severe cases, restoring directly from iTunes might do the trick, especially if there are compatibility issues based on hardware or software versions.
Addressing Transfer Errors
Common errors in iPhone transfer usually stem from network difficulties or outdated software on either device. It’s wise to check for the latest software updates prior to initiating the transfer. This can save the headache of dealing with transfer errors down the line. Internet connection instability is a prevalent problem—consider strengthening your Wi-Fi signal or, if possible, utilizing an Ethernet cable for less interruption during the transfer process.
Verifying Successful Transfer
Once you suspect that the transfer has adequately completed, take time to verify your files on the new device thoroughly. This verification step includes checking that your apps are installed, your settings are in order, and crucially, ensuring all important documents and photos have migrated successfully. Establishing a method to keep track of your data allows you to pinpoint where things may have gone wrong, ultimately ensuring you’ve transitioned to your new iPhone without losing vital information.
Key Takeaways
- Understand the importance of Apple ID and backups before transferring data.
- Choose between iCloud, iTunes, or direct transfer methods for smoother operations.
- Take precautionary measures to ensure data safety during the transfer process.
- Be proactive in troubleshooting common transfer issues to guarantee success.
- Always verify the completeness of data post-transfer for peace of mind.
FAQ
1. How can I use the Quick Start feature for transferring data?
The Quick Start feature allows you to set up your new iPhone by bringing it close to your old device. Follow on-screen instructions, inputting your Apple ID and enabling Bluetooth to transfer your information wirelessly.
2. What should I do if my old iPhone is lost?
If your old iPhone is lost and you need to transfer data, utilize **iCloud** to access any backed up content remotely. You can retrieve your data as long as it was saved before the loss.
3. Can I transfer my data without using Wi-Fi?
Yes, if your **Wi-Fi** connection is unstable, you can use a wired connection via **iTunes** or **USB** to perform the transfer without needing an internet connection.
4. How do I restore data if I switched Apple IDs?
Restoring data can become more complicated with a different Apple ID. You would need to back up your data under the old Apple ID and use it under the same profile to restore your content effectively on the new iPhone.
5. What common errors should I watch for during the transfer?
Common errors include connectivity issues or incompatible Ios versions. Regularly check for software updates on both iPhones and ensure that you maintain a steady network connection during the transfer process.
“`